
In this How To, we will create a Rust server and configure it. We will install a complete server: Oximode mod (and its plugins), custom map, how to make your server private, how to make a wipe, and more!
How to create Rust Server
Let's go. Before you start, know that the game can be resource-intensive (RAM / CPU). Just load your card (default 3 km2) will asked a lot of RAM. And every player who will join your server will also consume resources. The game is not multi-threaded, it must favor the CPU power to be able to accept a maximum of concurrent players on its parts.
For all these reasons, it is advisable to use a specialized hosting service to host a server, allowing you to ignore all hardware and networking constraints.
Not convinced yet ?! You can try for free our Rust Server Hosting services ;) You'll see, installing and configuring your server is greatly facilitated by the management panel.
Enough of talk, let's create our server:
And voila, our server is online! You can log in-game to make sure everything works properly.
Now we can go to server configuration.
How to connect to a Rust server
You do not know how to connect to your own server? Do not panic!
- Launch the game.
- Click on
F1to open client console. - To connect to your server, enter the command
client.connect game-fr-01.mtxserv.com:28015.
Remember to replace the address and port of the server. - You are connected on your Rust server!
How to configure a Rust Server
It is time to configure the server. First, we will modify the general configuration of the server (server name, password, etc.).
Then we will add the administrator rights to execute all the desired commands in the server console. Finally, we will install the mod Oxide and plugins.
General Configuration
The general configuration of the server is done in the file rust/server/mtxserv/cfg/server.cfg.
On a server hosted at mTxServ, you can modify the main parameters directly from the management panel, by clicking on Configuration and Advanced Configuration :
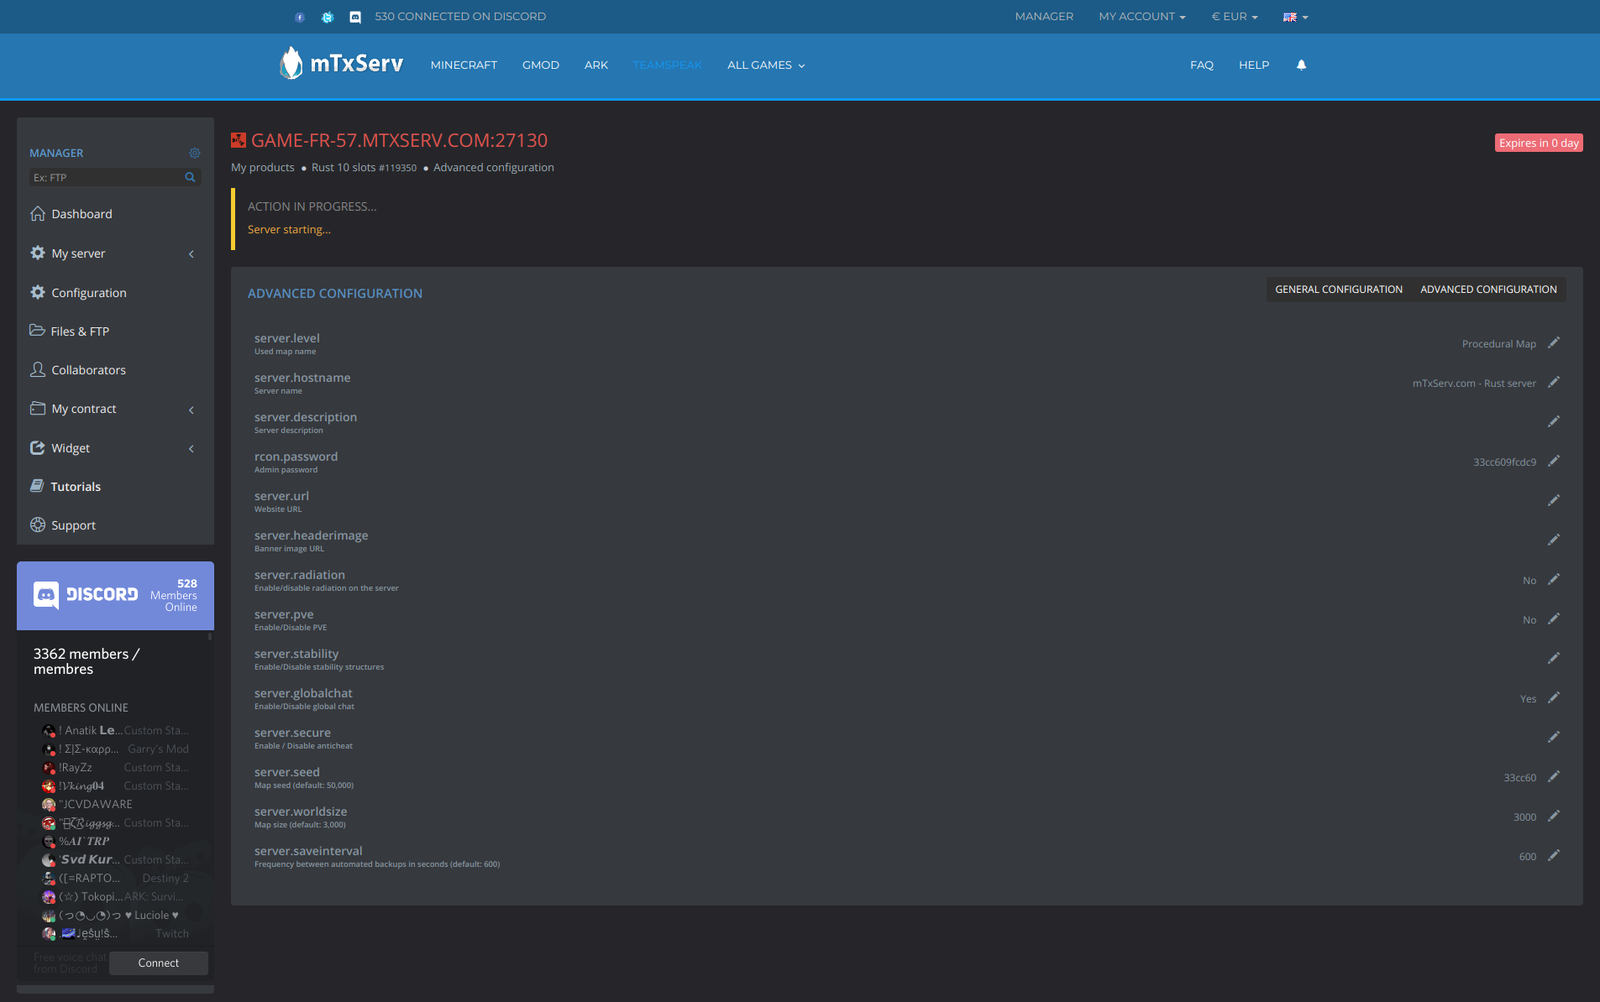
server.level
Name of the map used on the server.server.hostname
Name of the serverserver.description
Server description.rcon.password
Administrator password.server.url
Website URL.server.headerimage
URL of the banner image.server.radiation
Enable/disable radiation on the server.server.pve
Enable/disable PVE.server.stability
Turns on / off stability structures.server.globalchat
Enable/disable global chat.server.secure
Turn on / off the anti-cheat.server.seed
The seed of the map (default: 50000).server.worldsize
Size of the map (default: 3000).server.saveinterval
Frequency between automated backups in seconds (default: 600).
You can find out the list of in-game commands and server configuration options here.
How to become administrator on Rust server
Our server is configured, it is time to add admin rights. For that we will use the ownerid command (you need to have your SteamID 64).
Go to your management panel. In the server console, you can enter the command ownerid <steamid64> <playerName>.
For example:
ownerid 12345678901234567 Seb
To add moderators (who will have lesser rights), you can use the command moderatorid <steamid64> <playerName>.
Save the changes with the command writecfg. Then, all you have to do is reconnect to your server to receive the new permissions.
The permissions owner and moderator are almost identical, except that a moderator can not modify/add an owner.
Need more information ? Check out our tutorial on managing admins and moderators.
How to use a custom Rust map
To use a custom map on Rust, you must:
- Upload your map (
.map) on a web hosting (free on your server hosted on mTxServ).
Then get the web link to the .map file that we will configure on the server.
For example for a map newmap.map that I will have uploaded on my web hosting:https://mysite.mtxserv.com/newmap.map. - Now we have to tell the server that it must recover our custom map with
server.levelurl.
The fileserver.cfgin folderrust/server/mtxserv/cfgcan be edited with the Web FTP in the control panel (click on Files & FTP).
Add the following line in the file (this one will be detected by our startup script to add the parameter):server.levelurl "X"
X: URL of your map. For example:https://mysite.mtxserv.com/newmap.map. - Finally, you have to tell the server which map to use with
server.level.
During the creation of the map, its creator has configured a name that must be used in order to correctly configure the server.
Get the name of the map and put it back in the fileserver.cfg:Y = Name of the mapserver.level "Y"
- Restart your Rust server to apply the changes.
How do a Rust server wipe?
It is common to take advantage of updates (usually at the beginning of the month) to perform a "wipe" of the data, to reset some progress data of the game to:
- avoid possible bugs due to an update.
reset the state of your server and your players.
- map
- player data (inventories, blueprints, positions, etc.)
- all data
Refer to the tutorial on the wipe of a Rust server ;)
Make your server private
There is no parameter in configuration to add a password to a Rust server. To filter player allowed to join :
- Add the parameter
server.steamgroup <steamGroupId>in your configuration to restrict which can connect to your server. Before, you need to create a group on STEAM. - Use a whitelist (with the Oxide mod), like https://umod.org/plugins/whitelist.
Oxide Mod
Oxide is a mod necessary to change the behavior of the game in depth, it has a plugin system to extend the functionality of the server. Without Oxide, customization of a server Rust is very limited.
If the mod is installed on your server, it will appear in "Modded Servers".
Install the Oxide mod
You can install the Oxide mod in one click from your management panel:
- Go to the management panel.
- Click on
My Serverand after onPlugins. - Click on
Install. - Confirm the installation.
- Restart server.
You can now install the Oxide plugins of your choice, to download on the website uMod.
Install an Oxide plugin
Before you begin the installation of all the plugins that you will fall by the hand a few recommendations:
- Each plugin requires to be updated regularly.
- After each update of the game, check the compatibility of your plugins. If this is not the case, then you must wait for an updated version, download it and install it.
- Beware of an excessive number of plugins installed on your server which can add lag/bug.
.py file, or .lua usually a .cs file.To install a plugin:
- Go to the management panel of your server on mTxServ.
- Open the FTP Web by clicking
Files & FTP. - Go to
rust/oxide/plugins. Your Oxide plugins must be added to this folder. - Transfer your plugin to the folder
rust/oxide/plugins/. - To load the plugin, you can restart your server or use the reload command.
To avoid annoying all your players with a reboot, simply type in the console:oxide.reload nameofplugin:oxide.reload Deathnotes, oxide.reload Skins
- If the plugin has worked, it can generate configuration files in the folder
oxide/config.
To check that your plugin is loaded, look in the console server, you must have a message such as:[RCON][xxx.xxx.xx.xx:xxxx] oxide.reload DeathNotes Reload requested for plugin which is already loading: DeathNotes DeathNotes was compiled successfully in 1703ms Unloaded plugin Death Notes v5.2.12 by LaserHydra Loaded plugin Death Notes v5.2.12 by LaserHydra
Plugins Oxide Rust
Here is a list of the most used plugins on Rust servers:
- Whitelist
https://umod.org/plugins/whitelist
Restricts server access to whitelisted players with permission. - No Decay
https://umod.org/plugins/no-decay
With this plugin, foundations do not deteriorate when you're away. - Gather Manager
https://umod.org/plugins/gather-manager
Modify the occurrence of the resources (by a multiplier coefficient). - Stack Size Controller
https://umod.org/plugins/stack-size-controller
Change the maximum number of objects per slot in your inventory (by type of object). - Death Notes
https://umod.org/plugins/death-notes
Announce the death of the players in the chat. - Day & Night System
https://umod.org/plugins/time-of-day
Configure the day/night cycle (duration). - Sign Artist
https://umod.org/plugins/sign-artist
Import your picture on panels. - Skip Night Vote
https://umod.org/plugins/skip-night-vote
Delete the night cycle (by a vote on the server). - Night Lantern
https://umod.org/plugins/night-lantern
The campfires and lanterns light up automatically at a time you have defined. - Rust:IO Clans
https://umod.org/plugins/rustio-clans
Create a clan. You will have the name of your clan in prefix of your nickname and you have a private chat. - Pets
https://umod.org/plugins/pets
Adopt a pet. Tame a Bear, he will protect you. But do not forget to feed him. - Info panel
https://umod.org/plugins/info-panel
A bar appears at the bottom of your screen, giving you some information about server. - No Fuel Requirements
https://umod.org/plugins/no-fuel-requirements
Cancel the need for fuel for certain elements. - Quick Smelt
https://umod.org/plugins/quick-smelt
Accelerates the cooking speed of your oven and allow to cook metals in a campfire. - Teleportation System
https://umod.org/plugins/n-teleportation
To teleport to your base or to your friends. - Zone Manager
https://umod.org/plugins/zone-manager
Set a dedicated property area. - Kit
https://umod.org/plugins/rust-kits
Allows to create kit for players or for bots. - Human NPC
https://umod.org/plugins/human-npc
Add NPC and equip them - Path finding
https://umod.org/plugins/path-finding
Create round paths for NPC.
Go further
Follow all our guides on how to set up a Rust server: